
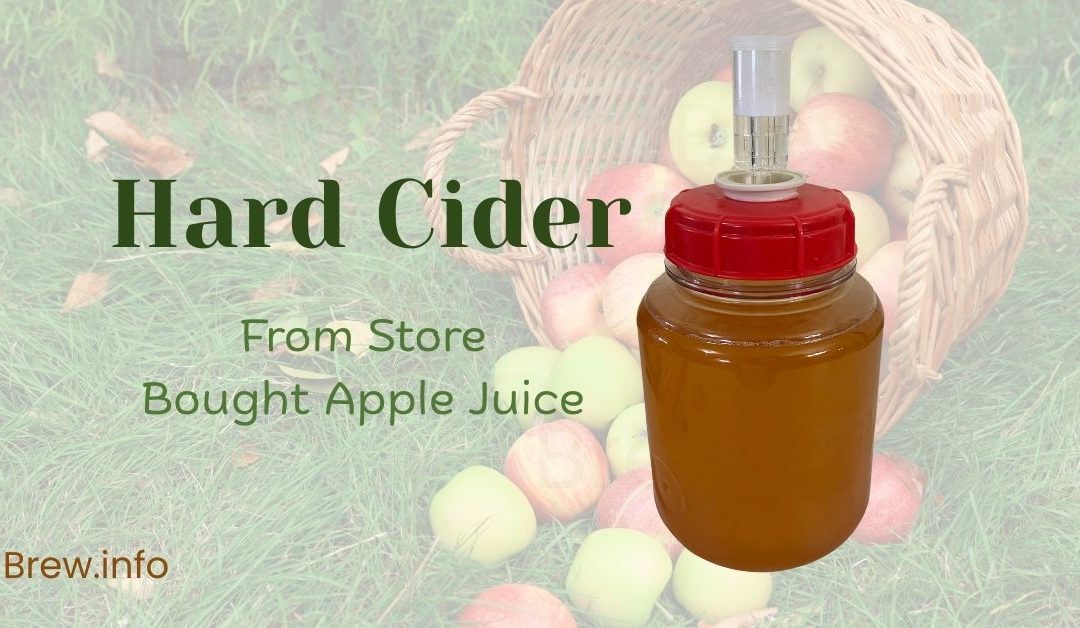
You want to make hard cider from store-bought apple juice, but you’re worried it will taste thin, smell like sulfur, or turn into a bottle bomb.
Here’s the truth: most “bad cider” isn’t about talent. It’s about missing one step and paying for it later.
Cidermaking follows a predictable workflow: sanitation, fermentation, stabilization, and packaging. Skip one or rush through it, and you pay the price at the end. The most common mistake? Guessing at timing. People add acid too early, backsweeten before fermentation finishes, or bottle before gravity stabilizes.
Most disasters happen during packaging, not fermentation. Bottles explode from too much priming sugar. Cider oxidizes during sloppy transfers. Batches go flat because the yeast is already dead.
I focus on two things: repeatability during the process, and control at the end. Nail those, and the cider takes care of itself.
What store-bought apple juice hard cider is
I’m taking store-bought apple juice and converting sugar into alcohol with yeast. That’s it. No magic. No hidden trick. The juice becomes hard cider because fermentation eats the sugar.
This matters because it predicts the finish. Most juice ferments dry. That means less sweetness, more bite, and more exposure of flaws. If the juice is bland, the cider will be blander.
What to expect from store-bought apple juice hard cider
I expect a clean cider that can feel lighter than the juice. The apple aroma often shows early, then fades at the finish. The body can feel thin. That is normal for filtered juice.
I also expect the first taste to be worse than the final taste. Young cider can be sharp. It can also feel “empty.” Time and carbonation help. So does better structure from juice choice and fermentation control.

Hard cider sanitation for a 1-gallon batch
If I get sanitation wrong, nothing else matters. A 1-gallon batch has less margin. One dirty funnel can ruin your homemade cider.
I sanitize everything that touches the juice after opening. That includes the jug/fermenter, bung, airlock, thief, and siphon. Then I keep splashing to a minimum once fermentation ends. Oxygen plus microbes is how off-flavors get invited in.
Ingredients for 1 gallon of store-bought apple juice hard cider
I keep this tight because complexity hides errors. A clean base teaches faster.
Here is my baseline set for a 1-gallon batch:
- 1 gallon store-bought apple juice
- Yeast suited for cider, wine, or clean ale ferments
- Sanitizer and a clean fermentation setup
- Optional: yeast nutrient for a cleaner finish – I recommend using a nutrient.
Choosing store-bought apple juice for hard cider
I read the label like it’s a contract. I want juice that ferments. That means no preservatives that block yeast.
I avoid these ingredients every time:
- Potassium sorbate
- Sodium benzoate or potassium benzoate
Then I choose based on the outcome. Filtered juice is easy and consistent. Unfiltered juice can add body. It can also stay hazy. If I can blend juices, I do. A little tartness and a little aroma go a long way in a small batch.
How to Make 1 Gallon Store-Bought Apple Juice Hard Cider
I want a process I can repeat without guessing. Every batch should follow the same steps, so I know what works and what doesn’t.
I also want a process that keeps me safe when I package. Most “cider disasters” don’t happen during fermentation; they happen at the end.
Bottles explode because someone added too much priming sugar. Cider tastes like vinegar because oxygen got in during transfer. A perfectly good batch goes flat (if you are going for a sparkling cider) because the yeast was already dead when it went into the bottle.
These aren’t fermentation problems. They’re packaging problems. And they’re all preventable.
That’s why I focus on two things: repeatability during the process, and control at the end. If I can nail those, the cider takes care of itself.
1 gallon hard cider equipment list
Here’s what I use for a clean 1-gallon batch:
- 1-gallon jug or small fermenter
- Bung and airlock
- Funnel
- Sanitizer and a spray bottle
- Optional but helpful: hydrometer, siphon, thief, and a small gram scale
If I plan to bottle, I also need bottles and caps. If I plan to keg, I need a keg and CO2. I decide that up front, because it changes my sweetening options later.
1 gallon store-bought apple juice hard cider recipe overview
The “recipe” is mostly a decision tree. Juice gives me sugar. Yeast turns it into alcohol. Temperature control keeps it clean. Time makes it drinkable.
My baseline approach looks like this:
- Choose fermentable store-bought apple juice (for this batch, we used organic apple juice from Lidl and only paid $1.99 per half gallon)
- Pitch a reliable yeast (We used Safcider)
- Keep fermentation steady
- Let it finish fully dry
- Primary fermentation, then package
I do not chase perfect numbers early. I chase a clean finish. I can tweak the flavor later.
Step-by-step: how to make hard cider from store-bought apple juice
Sanitize and prep the juice
I sanitize everything that will touch the juice after I open it. I focus on the jug/fermenter, funnel, bung, and airlock. I also sanitize my hands or wear gloves. This is the cheapest insurance in the whole process.
Then I check the label one more time. I want no potassium sorbate and no benzoates. If those are present, I pick a different juice.
Add headspace and oxygenate pre-pitch
I pour off a little juice to create headspace. I want room for foam and CO2. If I skip this, I risk a messy blowoff.
Before yeast goes in, I shake the jug hard. I want oxygen in the juice at the start. Yeast uses oxygen early to build healthy cells. I only do this once, right before pitching. After fermentation starts, I avoid oxygen.
Pitch yeast correctly for 1 gallon of cider
I pitch yeast based on the yeast type and the batch size. For a one-gallon batch, I do not need a full pitch (tossing the yeast into the fermenter) of a 5-gallon yeast packet. I still want enough yeast to start fast and finish clean. You can estimate what 1/5 of the packet is and use that for the one-gallon batch. I then store the rest in a zip-lock bag and place it into the refrigerator (this remaining yeast should be fine as long as you use it in the near future).
I also decide if I will use yeast nutrient. Store juice can be nutrient-poor. When yeast lacks nutrients, it can throw sulfur and stress flavors. If I want the simplest path to clean cider, nutrient is a good move.
Airlock setup and fermentation start checks
I install the bung and airlock and put the jug/fermenter somewhere stable. I aim for a steady temperature. I also keep it out of direct light.
I check for signs of fermentation in the first day or two:
- A bubbling airlock
- A cap of foam
- A cloudy swirl as yeast goes to work
If nothing happens after 48 hours, I troubleshoot. Most of the time, it is temperature, bad juice preservatives, or weak yeast.
Best yeast for store-bought apple juice hard cider
Yeast choice changes the finish more than most people expect. I pick yeast based on the experience I want in the glass.
Here’s how I think about it:
- Wine or champagne yeast gives me a clean, dry finish
- Cider yeast often keeps the apple profile forward
- Neutral ale yeast can feel rounder and softer
If I want crisp and dry, I go with wine yeast. If I want more apple expression, I go with cider yeast. If I want easy drinking, I consider a neutral ale yeast. The best yeast is the one that matches the target.
Yeast nutrient for store-bought apple juice hard cider
I add yeast nutrient because store juice is not always built for fermentation. It is built for drinking. Nutrients keep yeast from getting stressed and leaving behind weird aromas.
If I use a nutrient, I add it early. I keep the dose modest. I want support, not a chemical taste.
The payoff is simple:
- Cleaner aroma
- Fewer sulfur notes
- Better reliability in small batches
Fermentation temperature for 1 gallon of hard cider
Temperature is my hidden lever (each yeast strain has an optimal fermentation temperature – read the packet for it or visit the yeast maker’s site). A hot ferment can taste harsh. A stable ferment tastes cleaner and keeps the apple aroma intact.
I pick a temperature range I can actually hold. Then I hold it. Even a few degrees of stability help.
If my space runs warm, I use a water bath or a cooler spot. If my space runs cold, I use a warmer room. I keep it practical.
How long does store-bought apple juice hard cider take to make
Primary fermentation usually finishes fast. Drinkable cider takes longer.
I think in phases:
- Fermentation phase: days to a couple of weeks
- Clearing and settling phase: another week or two
- Improvement phase: a few more weeks if I can wait (if you bottle condition, this is not as important)
The key is not the calendar. The key is completion. If I package before it finishes, I risk overcarbonation and off flavors.
Racking, clearing, and aging 1 gallon of hard cider
Once fermentation finishes, I rack off the sediment (if doing a secondary fermentation). I want a cleaner flavor. I also want less yeast bite.
Clearing happens with time. Cold helps. So does patience.
I don’t fight haze unless I want the cider to look crystal clear. Clarity doesn’t equal quality. Some of the best ciders I’ve made were cloudy. But if you want clear cider, cold-crashing (dropping the temperature to near-freezing for a few days) will drop out yeast and particulates faster. Pectic enzyme also helps if you add it before fermentation.
Aging makes a bigger difference than clarity. Young cider can taste sharp and disjointed. The apple flavor feels separate from the alcohol. The finish can be harsh. A few weeks of aging smooths everything out. The flavors integrate. The rough edges soften. The cider starts to taste like one complete thing instead of parts fighting each other.
I give every batch at least two weeks after fermentation finishes before I even think about packaging. If I can give it a month, even better. The cider will tell you when it’s ready; it stops tasting green and starts tasting balanced.
Bottling vs Kegging: How to Package Without Disasters
Packaging is where most people get hurt, not physically, but emotionally. Bottle bombs are real. Flat cider is also real. Over-sweetened messes that keep fermenting are real.
I decide what I want before I start packaging, then I follow the rules for that path.
Still cider is the simplest. I package when fermentation is completely done, and the cider is stable. No priming sugar. No guessing. Just finished cider in a container. This works in bottles or a keg.
If I want it sweet, I can backsweeten, but I need to stabilize first with potassium sorbate and potassium metabisulfite. Skip that step, and fermentation can restart in the bottle.
Bottle carbonation requires priming sugar, and I measure it exactly. I only prime after fermentation is complete and gravity has been stable for at least three days. Here’s the tradeoff: bottle carbonation makes sweetness nearly impossible. If I add fermentable sugar for sweetness, the yeast will eat it. That’s how bottles overpressurize and explode. The safe approach is to carbonate dry cider only.
Kegging gives me control. A keg lets me carbonate with CO2 instead of priming sugar, which means I can backsweeten without worrying about refermentation. I can also adjust—release pressure if carbonation is too high, add more CO2 if it’s too low. I can taste and tweak without committing to bottles. Kegging isn’t required, but it’s the cleanest, safest path when I want sweet and sparkling cider at the same time.
The rule I follow: Dry and sparkling? Bottle or keg, either works. Sweet and sparkling? Keg with force carbonation, or use non-fermentable sweeteners in bottles (erythritol, xylitol, stevia). Never rely on bottling with fermentable sugar if you want it to stay sweet. Still and sweet? Bottle or keg, just stabilize first with potassium sorbate and potassium metabisulfite to prevent refermentation.
Backsweetening is a safety decision first, flavor decision second. Treat it that way, and you won’t blow up bottles or ruin batches.

Malic Acid in Hard Cider (1 Gallon)
Most store-juice cider finishes clean and dry, then disappoints in one specific way. The finish drops. The apple flavor feels muted. The whole thing tastes “correct,” but not compelling. That’s when I use malic acid. I do it with restraint, because acid is a scalpel, not a hammer.
What malic acid is in hard cider
Malic acid is the natural acid associated with apples. In a dry cider, it can bring back that crisp apple snap that fermentation often flattens. It does not add sweetness. It adds structure. It makes the finish feel tighter and more intentional.
I think of it as a way to reintroduce tension. A good dry cider needs a reason for the next sip. Malic acid can create that reason, especially in a 1-gallon batch made from filtered store-bought apple juice.
When I add malic acid to hard cider
I default to adding malic acid after fermentation. I want the cider to show me the truth first. Dryness changes everything. Aroma shifts. The finish reveals what is missing.
I only consider adding malic acid before fermentation when I care about process control. That means I am measuring pH, and I see a reason to adjust the fermentation environment. If I am not measuring, I do not guess. I wait and adjust for flavor later.
Adding malic acid after fermentation
This is my normal workflow for store-juice cider. I let the fermentation finish. I rack off sediment. I taste the cider as it is. Then I adjust.
Post-fermentation adjustments give me control. I can taste changes in real time. I can stop the moment it tastes right. That is the whole game.
Adding malic acid before fermentation
I do this only when I have a clear process goal. I want yeast to ferment clean. I want the environment to be less friendly to spoilage. I still make small moves.
If I do pre-ferment adjustment, I add a little, mix well, then recheck. I do not try to “solve flavor” before fermentation. Flavor belongs after fermentation.
How much malic acid per gallon of hard cider
I measure in grams. I do not trust spoons unless I have to. A 1 US gallon batch is 3.785 liters, so g/L converts cleanly to grams per gallon.
For most dry store-juice ciders, I start at 0.5 to 1.5 g/L. That equals 1.9 to 5.7 grams per 1 US gallon. If I want a simple default, I start around 4 grams per gallon, then I taste and adjust.
Here is the quick conversion table I use:
| Target dose (g/L) | Add per 1 US gallon (grams) |
|---|---|
| 0.5 | 1.9 g |
| 1.0 | 3.8 g |
| 1.5 | 5.7 g |
| 2.0 | 7.6 g |
If I must use spoons, I treat them as estimates. A level teaspoon is often about 3 to 4 grams. Powder density varies, so I weigh one level teaspoon once. Then my spoon fractions become accurate for my powder.
Bench Trials and Measuring Acidity
I never adjust the full gallon first. I test on a small sample. This is where people save the batch.
I pour three 4 fl oz samples (half a cup each), then dose each one slightly higher than the last. I keep doses small because the scaling math multiplies quickly.
Here’s a clean bench trial that stays inside safe ranges:
- Sample A: 0.05 g malic acid
- Sample B: 0.10 g malic acid
- Sample C: 0.15 g malic acid
I stir each sample, wait a few minutes, and taste in order. Then I pick the best one.
Scaling is easy. 4 fl oz is 1/32 of a gallon. Whatever I add to the sample, I multiply by 32 for the full gallon. If 0.10 g tastes best, that’s 3.2 g per gallon, a normal adjustment. This is why I like small sample dosing.
pH vs TA: What Actually Matters
pH helps me understand the fermentation environment. It matters for stability and microbial risk, but it doesn’t map cleanly to perceived tartness.
Titratable acidity (TA) maps better to what I taste. It tells me how much acid is present in a way my palate can recognize. I don’t need TA to make good cider, but it helps me repeat results if I run many batches.
If I choose one tool, I choose a gram scale. That keeps dosing accurate. Taste handles the rest.
Balancing malic acid with sweetness, tannin, and carbonation
Acid does not exist alone. It interacts with everything.
If I plan to backsweeten, I sweeten first, then adjust malic acid. Sweetness changes perceived tartness. If I adjust acid first, I often overshoot.
If the cider tastes thin, I consider tannin. Tannin adds grip. It can make the same acidity feel more “apple-like” and less sharp.
If the cider is sparkling, I remember that carbonation boosts bite. A cider can feel perfectly crisp when flat, then feel too sharp once carbonated. I bench taste with that in mind.
Malic acid mistakes and how I fix them
If I overshoot and the cider tastes harsh, I do not panic. I start with time. Acid can feel sharp right after mixing, then settle.
If it still feels too sour after a day, I balance instead of adding more acid. I may add a touch of sweetness if I can do it safely. I may add a tiny amount of tannin to round the shape. If I have another batch, I blend.
If the cider still tastes flat after adding acid, I stop adding acid. I check carbonation. I check oxidation. I check the structure. Sometimes the missing piece is tannin, not acidity.
Troubleshooting Store-Bought Apple Juice Hard Cider (1 Gallon) and Conclusion
Most people quit cider for one reason. They get one weird batch and assume the method is broken. It’s not. The method is simple. The failure points are predictable. If I diagnose in the right order, I fix problems fast and keep the next batch clean.
Troubleshooting checklist for store-bought apple juice hard cider
I start with the highest leverage checks. These solve most problems without drama.
First, I ask three questions. Did the fermentation finish? Did I introduce oxygen after fermentation? Did I package too early?
Then I move through the core variables:
- Sanitation quality
- Juice preservatives
- Yeast health and pitch
- Temperature stability
- Packaging method and timing
If I change one thing, I change one thing. That’s how I learn. That’s how I stop repeating mistakes.
Common off-flavors in store-bought apple juice hard cider
Sulfur and stressed yeast
If I smell rotten egg or struck match, I assume yeast stress. Store juice can be nutrient-poor. Warm fermentation can also push yeast into ugly aromatics.
I fix it with the basics. I warm the batch slightly if it fermented cold. I swirl gently to lift the yeast back into suspension. I give it time. If I’m early in fermentation, I use yeast nutrient on the next batch as prevention.
Most sulfur fades with time. If it does not, I review my process. I look for nutrient issues, temperature spikes, and underpitching.
Solvent heat and harsh alcohol
If it tastes like hot booze or nail polish, I look at the temperature first. A warm ferment can create harsh alcohol notes. A fast ferment can do it too.
I do not try to mask it with sweeteners. I age it. Time is the fix. Then I run the next batch cooler and steadier. That usually removes the problem.
Oxidation and flat apple character
If it tastes like bruised apple, cardboard, or dull sweetness, I suspect oxygen. Oxygen kills freshness. It also makes a simple cider feel old.
I prevent it by moving the cider gently once fermentation ends. I avoid splashing. I keep headspace small in secondary. I package sooner instead of letting it sit exposed.
Preventing oxidation in a 1-gallon hard cider batch
One gallon is small, so it is easy to slosh. I treat transfers like a quiet operation.
I do a few simple things. I siphon instead of pouring. I keep tubing below the liquid surface. I rack only when I have a reason. I keep lids on when I can.
If I taste a batch and it already feels tired, I stop fiddling. Every extra transfer is a risk.
Stuck or slow fermentation in store-bought apple juice hard cider
When fermentation stalls, I look for the obvious causes first. Most stalls are not mysterious.
I check the temperature. I check for preservatives. I check yeast age and storage.
Then I use a simple recovery path:
- Move the fermenter to a steady, warmer spot
- Swirl gently to resuspend yeast
- Wait a full day and watch for a change
If it still does nothing, I re-evaluate the juice label. If the juice had potassium sorbate or benzoates, the batch may never finish cleanly. The best fix is prevention. I choose better juice next time.
Clarity and sediment management for 1 gallon of cider
I do not chase crystal clarity. I personally prefer flavor over the look of a crystal clear cider. Haze is not a failure. Sediment is normal in small batches.
If I want clearer cider, I let time do the work. Cold also helps. I rack off heavy lees when fermentation is done, then I let it settle again.
If I bottle, I accept a thin sediment layer. I pour gently. I leave the last splash in the bottle.
Upgrades that improve store-bought apple juice hard cider without acids
If the cider tastes thin, I do not assume it needs more acidity. Often, it needs structure or aroma.
Here are upgrades I use that do not require acid adjustment:
- Blend juices for complexity
- Add a small amount of tannin for grip
- Use yeast nutrient for a cleaner ferment
- Ferment cooler to preserve aroma
- Age for a few extra weeks before judging
These are boring improvements. But they also work.
Conclusion: A Reliable System, Not a Shortcut
Making hard cider from store-bought apple juice is not complicated. I pick fermentable juice without preservatives. I keep sanitation tight. I ferment at a stable temperature. I package only when fermentation is done, and gravity is stable. That alone gets me a clean, drinkable 1-gallon batch.
Then I improve it with intent. I don’t chase ten changes at once. I taste the finished cider, diagnose what’s missing: brightness, body, carbonation, then fix one variable and taste again. Malic acid if it’s flat. Tannin if it’s thin. Carbonation if it needs lift. One adjustment at a time.
When I follow that discipline, store-juice cider stops feeling like a shortcut and becomes a reliable system. I know what the juice will give me. I know where it falls short. And I know exactly how to fix it without guessing or wasting batches.
The cider won’t taste like farmhouse pressing from heirloom apples. But it will taste clean, balanced, and intentional. And most importantly, it will taste the same way every time I make it because I’m following a process, not hoping for luck.
© 2026 by Brew.info, All rights reserved. No part of this document may be reproduced or transmitted in any form or by any means, electronic, mechanical, photocopying, recording, or otherwise, without prior written permission.
Author: Stu
Meet Brew.info's founder and head brewer, Stu. He began homebrewing as a hobby 13 years ago and has now made it a full-time career. He gives his advice, recipes, and reviews of equipment on Brew.info in an effort to encourage others to experience the satisfaction of homebrewing beer. You can find him trying out new breweries and beers, or unwinding at home with a pint of his most recent creation, when he isn't busy brewing or writing about beer. Cheers!