You’ve made the decision to start a rewarding (and occasionally difficult) homebrewing adventure. Though we might be a little partial, we believe you made a great decision to come here. Or perhaps you’ve been making beer at home for a while and are looking to improve. Homebrewing is a continuous journey that we can go on together. The end goal is to create a tasty brew to share with our friends.
Beer brewing is both an art and a science, and a lot of the quality of the beers we make at home with our hoppy creations depends on the equipment we employ. In the long run, you’ll save more money by not having to continually repair cheap equipment or waste entire batches of beer fermented in the wrong kinds of vessels. A decent setup might be more expensive up front, but in the long run, it will be worth it.
The brewing process (All Grain vs. Extract) and your budget will all dictate what choices to make. The bottom line is that when you know how to pick the appropriate homebrewing equipment, you can brew better-tasting beer and avoid contamination issues (you don’t want to lose a batch) on any budget and skill level.
Homebrewing kits (ingredients, equipment, or both)
Brewing ingredient kits are the way to go, whether you’re new to homebrewing and want to start with your first tiny batch right away or you want everything you need for all-grain brewing in one box (which would also include some basic equipment). There are kits available for making almost any type of beer. The best part is that they come with instructions and all the ingredients you need for that homebrewing recipe.
The main ingredients of beer brewing kits are either liquid extract (Extract beer kit), milled grains (All Grain beer kit), or a combination of the two (Partial Mash). Some merely contain ingredients, while more expensive kits could also come with all the homebrewing equipment for making beer.
Kits can be a cost-effective way to purchase a complete system for a single fee. What is included, however, varies greatly depending on where you get it and the style of brewing you intend to perform (extract or all grain). Make sure to determine whether you require any additional items, such as a brew kettle (you can use a large sauce pot) or bottles, before making a purchase.
Extract brewing ingredient kits
The least expensive and primarily geared toward novice homebrewers (though advanced brewers also use extract) are extract kits. The brewing process entails filling your kettle with water, hops, extract, and steeping grains, then heating and cooling your wort.
The freshly made wort will then be placed in a fermenter with yeast. Depending on your equipment, your wort will need to ferment for at least a few weeks before it can be bottled or kegged. In essence, these kits let you totally bypass mashing, a crucial stage in all-grain brewing. It is a big time saver by skipping the mashing process, which can normally take an hour.
All Grain Brewing Ingredient Kits
Consider all-grain brew kits if you’re ready for the next level in brewing. This more “advanced” process is mimicking how professional breweries make beer on a much smaller scale. Instead of extract, these kits are sold with grain in time-tested beer styles. These kits require the mashing of grain, while extract kits have this step completed for you. It’s an additional step that will give you more control over the brewing process.
If this is your first attempt at all-grain brewing, be aware that these kits require far more equipment than an extract kit would. Expect to spend some money, whether you decide to purchase an entire all-grain brewing system, a mash tun fashioned from a cooler, or assemble your own equipment. Homebrewers can get very creative.
Partial mash brewing ingredient kits
In search of a convenient middle ground between a basic extract and all-grain brewing? Kits for partial mashes (or mini-mashes) include grains and malt extract. Brewers normally use the extract to supplement the brewing process with these kits. It allows you to make a bigger beer (higher ABV) without buying larger more expensive equipment.
Grain Mills
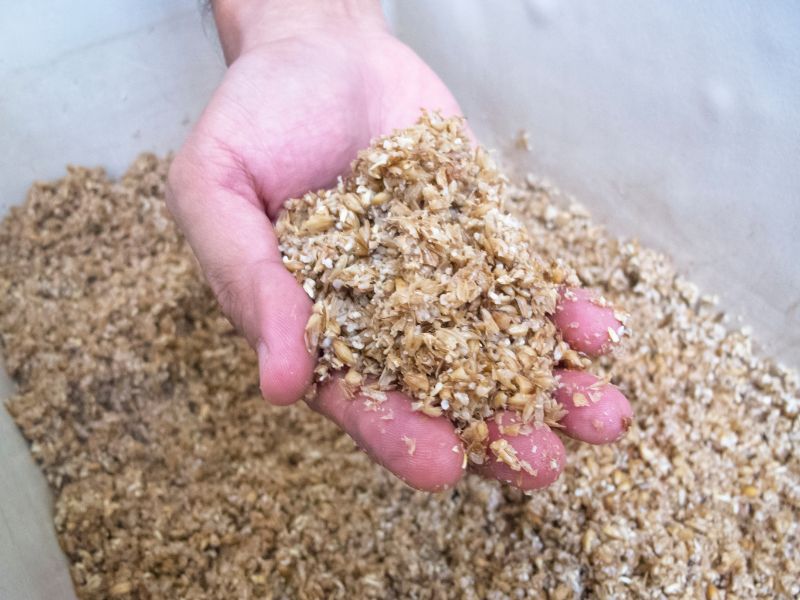
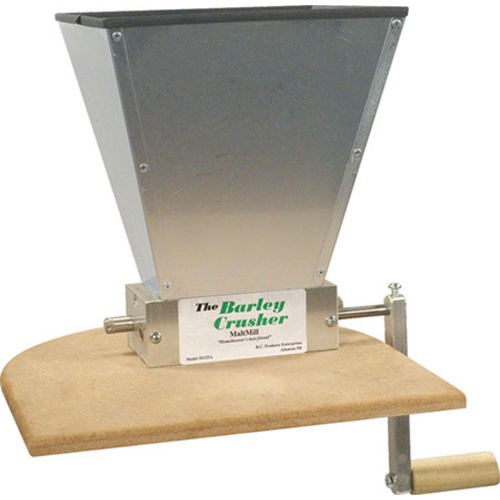
Owning your own grain mill pays you in the long term if you conduct all-grain brewing at home. With a grain mill, you may crack your grains shortly before brewing to preserve their freshness. You can even buy unmilled grain in bulk for less money and process it yourself to save money. And a lot of the mills will allow you to attach an electric drill so you don’t have to manually turn the handle.
Extract beer kits will come with steeping grains that are milled for you. You can also buy all your grain pre-milled if you want to do All Grain brewing, but as I said above you will have freshness issues if you don’t use the grain in a timely manner.
A grain mill is a great purchase that will come in handy and only help your brewing process as you advance.
Homebrew Equipment Kits
Instead of purchasing each piece separately, you can purchase an equipment kit with all the tools you need to make beer. This is a convenient way to get into brewing. We highly recommend that you go this route as most of the beginner equipment can still be used going forward as you get more advanced. A number of equipment kits are readily accessible, or if you’re feeling particularly adventurous, you can construct your own components, such as a mash tun.
Make a list of the tools you’ll require, and then look for a kit that includes all of them, or at least the majority of them. If a component of the kit is missing, you can purchase it separately. Check that you have everything before starting. There are few things more annoying than getting ready to brew and then realizing you’re missing one easy item that wasn’t in your kit.
Here’s what normally comes in a starter equipment kit for making 5 gallons of extract brew:
- Food Grade Plastic Six Gallon Fermenter with a spigot, stopper, and airlock
- Food Grade Bottling Bucket with spigot
- Mesh bags for steeping grain and hops on Brew Day
- Thermometer for easy temperature management
- Hydrometer for making key sugar measurements
- Transfer Tubing
- Bottling Wand with shut-off valve
- Sturdy Bottle Capper
- 50 Bottle Caps
- Bottle Cleaning Brush
- Star San Sanitizer for true sanitizing
You will still need a kettle/pot, ingredients, and bottles/keg.
Equipment for the boil
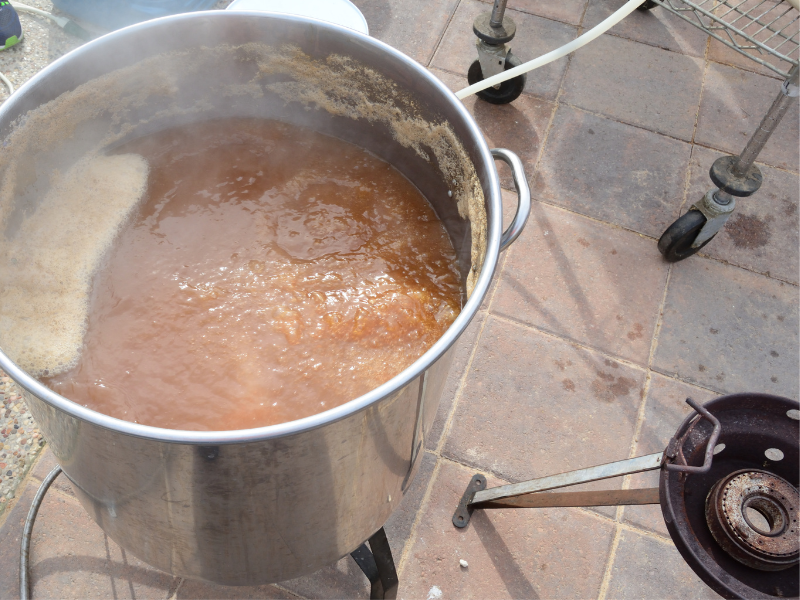
You must boil the ingredients unless you’re using a no-boil beer brewing kit. You’ll add hops and steepling grains (if extract) to your wort during the boil. It will normally be 60 to 90 minutes, depending on the hop addition schedule. Your hops undergo a molecular transformation when you boil them, producing isomerized alpha acids that give your beer the appropriate bitterness. Additionally, the procedure boils off sulfur compounds that can give you odd flavors and it also stops the enzymatic activity.
Additionally, boiling sterilizes your wort (sugary liquid derived from grain) before fermentation by killing all the bacteria. Finally, this stage aids in determining the ideal beer volume and target gravity (how much sugar do we have?) Make no mistake, the right boiling equipment is a crucial component of the homebrewing tool chest.
Kettles/Pots
Although the kettle used to boil the wort may appear to be simple cookware, it is essential to create your beer, and will be used every time you brew. If you’re brewing with extract, you can boil water in a big pot on the stove, and you won’t require professional-grade equipment, but having a well-made, quality brew kettle can really improve your brewing experience. A pot is used for regular cooking and may not be the optimal material or design for the brewing process in this discussion, whereas a kettle is a vessel specifically made for homebrewing.
There are some ideal characteristics a brewing kettle or a pot should have. It would be a stainless steel brew kettle unless you’re on a tight budget, then you can use any large enough pot you may already have. If you have a 5-gallon sauce pot, you are good to go with extract brewing. If you have the money, you can get a kettle with a tri-clad bottom for even heating. Stainless steel is simple to maintain and won’t turn discolored when exposed to heat. However, aluminum brew kettles will still do the trick if you need to keep your costs down.
You need adequate space in your kettle when you boil your wort so you can avoid a boilover. There’s nothing worse than having sweet, sticky wort all over your stove and then explaining it to your angry wife. Select a pot that is somewhat bigger than the volume of beer you are brewing and the ingredients you will be adding. For 5-gallon full-volume batches of extract brew, an 6-7 gallon kettle typically works well. For five gallons of all-grain brew, you’ll need a 6-7 gallon kettle, and for five gallons of brew in a bag (BIAB), a ten-gallon kettle at least. There are many brewing calculators to help you determine the required volumes.
Look for models with practical features like volume indications etched inside or with a sight glass outside if you want to invest in a brewing kettle that will not only last you a long time but also make your brewing experience simpler. You can drain off the wort without fiddling with a siphon by using a ball valve. And while doing so, a kettle strainer will prevent your valve from clogging, and silicone handles make moving a hot brew pot safer and easier.
Equipment to Cool your Wort
After boiling, promptly cooling your wort quickly helps to prevent an infection from bacteria and will allow you to pitch your yeast to get the fermentation process going. New brewers commonly use an ice bath in their sink to cool off the wort. This is a good way to start your brewing journey since it doesn’t require extra equipment. This becomes very difficult when you attempt to brew larger batches of beer. And having the equipment to cool the wort faster is always the best option and doesn’t require a bunch of ice. Your brew will chill more quickly and easily if you use one of the three varieties of wort chillers. It’s a big-time saver!
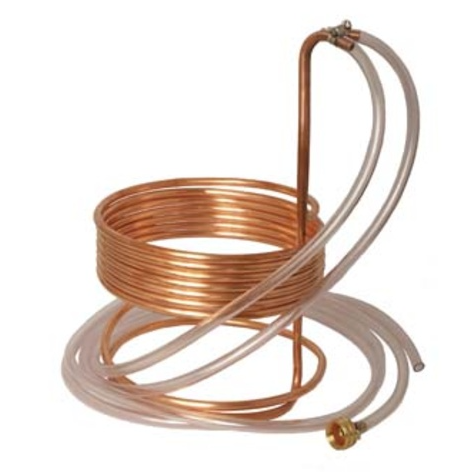
Immersion chiller
The most affordable choice is an immersion chiller, which you submerge in your brew kettle. It is made of stainless steel or copper coil. Then, after using a straightforward adaptor to connect it to a faucet (normally your kitchen) or backyard spigot, you cool your wort by running cold water through the coil. Choose the appropriate size for your kettle. Once you place it into your kettle it will draw away the heat using the cooler water circulating in the coil.
Counterflow chiller
Two tubes, one within the other, are located outside your brew pot in a counterflow chiller. As with an immersion chiller, cold water is flushed through the outer tube. The inner tube draws hot wort from the kettle in the opposite direction of the water at the same time. Even though the water and wort are never in touch, the cold water immediately chills the wort. A benefit being less water will be used than with an immersion chiller.
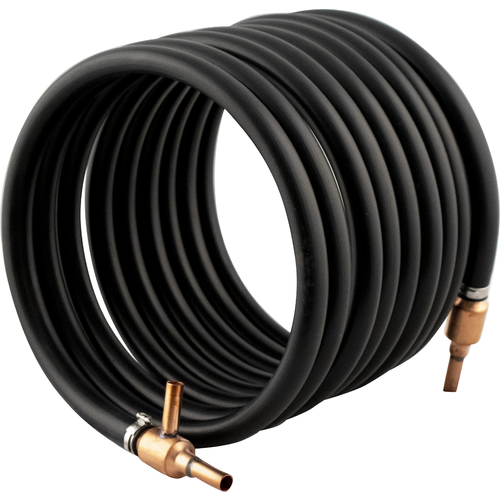
Plate chiller
The plate chiller, which consists of numerous plates piled on top of each other through which water and wort run side by side, is the quickest way to chill your wort. Despite having the greatest price, it consumes the least amount of water and cools the fastest. Plate chillers frequently develop clogging problems, therefore in this situation, going with a less expensive alternative might be your best option.

Infusers and Filter Screens for Hops
If you allowed your fruit, spices, and hops to float freely in your wort, they would clog up your chiller or carboy. Without making a huge mess, you can add flavor to your homebrew by using filter screens or infusers.
A mesh hop bag offers greater convenience than a straightforward hand strainer for this task. Hops will be thrown into the bag, which will then be tied and placed in your kettle.
An alternative is a cylindrical steel filter known as a hop spider. They include a convenient hook that you can attach to the side of your kettle, which allows for a little more efficient use of hops than a mesh bag that is securely secured. And it’s a sturdy, long-lasting piece of brewing equipment.
Propane Burners
Once you outgrow your stove top you can purchase a propane burner for your homebrewing system, size is the most crucial factor to take into account. The amount of heat needed to raise the temperature of one pound of water by one degree Fahrenheit is known as a British thermal unit (BTU or Btu). Each burner will list how many BTUs it is rated for.
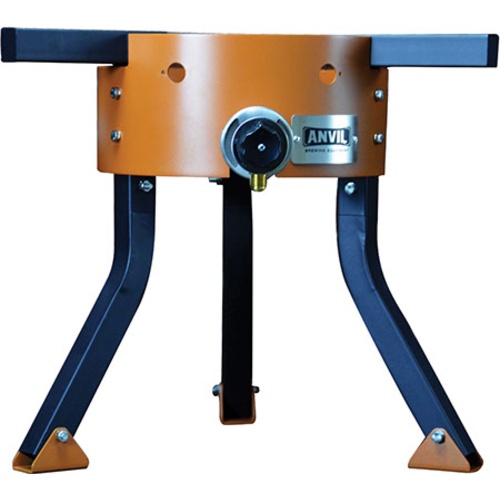
The BTU value of your propane burner essentially indicates how rapidly the burner will boil your wort. A higher value doesn’t always equal better, but as a point of comparison, your kitchen range usually produces around 7,000 BTUs, whereas a propane burner for home brewing produces hundreds of thousands.
If you decide to use a camping stove outside instead, make sure to buy one with short, wide-set legs so it won’t topple over when a large pot of wort is resting on it.
Brewing Spoons and Paddles
Typically, stirring utensils range in length from one to three feet. Spoons are an economical choice with a solid surface for stirring, whereas paddles feature tiny apertures to aid in breaking up mush. Both can be made of bamboo, heat-resistant plastic, wood, stainless steel, and these materials.
You will have a lot of flexibility in deciding what to use to stir your wort or mash. Even if you don’t need a tool that is primarily sold as a piece of homebrewing equipment, you merely need something lengthy and powerful for stirring. Down the line, you can get a fancy mash paddle with some personalized engraving if you desire.
Thermometers for brewing
The right temperature is crucial while making beer. If you allow your wort to cool too slowly, a wide variety of germs will flourish. Miss the point at which your wort is going to boil, and you can end up with a sticky mess. How do you determine when to add the yeast? What is it is the optimal temperature?
In a pinch, homebrewers have been known to utilize meat thermometers or candy thermometers. However, having a thermometer specifically designed for brewing ensures a more precise temperature reading.
Floating thermometers are a practical and inexpensive piece of equipment that will do the job, although stainless steel probes are frequently a little more precise. Although attached stainless thermometers, whether welded or not to your kettle are nice, they are not a requirement for making great beer. You might decide to use your beer equipment budget on something more important.
Brew in a Bag (BIAB) Equipment
You can experience some sticker shock when you wish to switch from extract brewing to all-grain brewing because of all the additional homebrewing equipment you’ll need to purchase. The BIAB approach allows you to get toward all-grain gradually rather than all at once.
The only tools you’ll need are a kettle and a nylon mesh strainer bag. They are available both individually and as a set in BIAB equipment kits. There are strainer bags available for all-size kettles/pots.
Make sure to confirm the appropriate bag size for your kettle size if you purchase the bag and kettle separately. Some brewers stick with BIAB due to its simplicity and less cleanup.
Fermentation and fermenters
Your beer needs to go through fermentation in order to create alcohol and carbonation (if bottle conditioning). Despite the fact that you become more of a bystander while the yeast does the labor, this part takes the longest in the brewing process.
During fermentation, yeast accomplishes all the labor-intensive work of converting sugars into alcohol and carbon dioxide. For fermenting, having the appropriate homebrewing equipment is essential and should not be underestimated.
You’ll require a vessel that can store your wort while the yeast ferments it into beer. There are many options available to you. Here are the main options below:
Fermenter Bucket: A normal old food-grade bucket is potentially the least expensive choice. There are containers available that can store up to 20 gallons of wort. A hole may be bored in the lid of a fermenter bucket designed expressly as homebrewing equipment and a rubber grommet fitted for use with an airlock to relieve gas pressure. An average five-gallon batch of beer ferments in a 6.5-gallon fermenting bucket that is often included in starter equipment sets.
Plastic Carboy: A less expensive option than its glass counterpart, a plastic carboy is comprised of non-porous plastic that won’t leach impurities into your beer or absorb flavors from previous brews. Additionally, there are plastic alternatives available in various shapes that might be easier to move and clean than the traditional carboy design. They will also require a bung like the glass carboys. An example would be a Fermonster fermenter.
Glass Carboy: This is a sizable glass jug with a narrow neck that is typically sealed off with a rubber stopper (bing). If you take care of glass carboys, they will last a long time and remain attractive. You can purchase handles and carriers and other accessories for them. They also provide very good protection from oxygenation. The big drawback is that they can easily break and become a mini fermenting disaster.
Conical Fermenter: A few businesses have created fermenting vessels resembling those you could find in an industrial brewery. These fermenters have a valve at the point of a conical bottom. Because of their design, yeast may easily drain out the valve for disposal or reuse after settling in the cone. The most expensive and best choice is often conical fermenters. This is as close as you can get to purposely built professional brewing equipment.
Oak barrel: This can be used for secondary fermentation or for primary fermentation for making barrel-fermented beer. In order to provide a mild flavor, clean beer can also be added to an oak barrel for maturing. Although oak barrels are not essential homebrewing equipment, they are an intriguing choice if you want to experiment with new equipment and flavoring techniques.
Temperature control
You can regulate the temperature in your fermenter and maintain it in a steady range by doing everything from using a fan to buying a heater that wraps around your carboy.
Thermostat: To keep your brew at the ideal temperature, you can plug heating and cooling equipment into a thermostat (also known as a temperature controller), monitor the fermenter’s temperature, and turn the equipment on or off as necessary. The Inkbird is a popular thermostat controller option.
Wraps and pads: You can keep your fermentation vessel warm by using electric heating pads, heat wraps, and jackets made of a material similar to that used in soft-sided coolers. Some techniques work better than others. Select a wrap or pad that is appropriate for the type of fermenter you are using.
Fermentation chamber: Advanced brewers normally set up a fermentation chamber. It’s a combination of a freezer/refrigerator and a thermostat controller like the Inkbird. The fermenter is placed into the freezer/refrigerator with the thermostat automatically controlling the fermentation temperatures. This is the more expensive and best option for optimal fermentation temperatures.
Flasks and Stir Plates
In order to make great beer you need the best yeast cell count to start a good fermentation. You can aerate your wort to create a yeast starter by using flasks and stir plates. Suppliers sell yeast starter kits and nutrients that can help get you going.
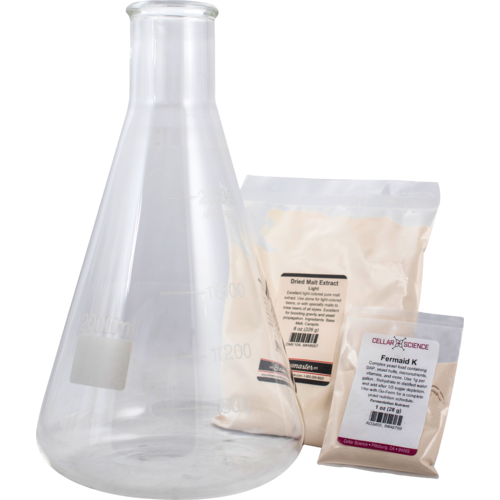
They are not a necessity, but they are a powerful addition to your brewing toolbox. It will be possible for you to cultivate and test your yeast, switch from dry packets to fresh liquid, and even create a starter using your past brews.
Tubing for Beer Racking, Siphoning, and Transfering
Homebrewing needs tubing that comes in different sizes that are made of many materials. Tubing is used throughout the brewing process. When liquids travel from point A to point B they do so via tubing. Tubing should be a more affordable part of brewing, and it’s better to play it safe by using new tubing periodically, especially on the cold side of brewing where there’s a greater possibility of infecting your beer. Expect to replace it frequently and keep it clean. Getting the proper size and the right kind for the job is the most vital decision.
Siphon hose tubing must be cleaned and sanitized to prevent contamination before being used to transport finished beer from the fermenter. Because it has thinner walls and is more flexible than some other forms of tubing, including braided beverage hose, food-grade vinyl is the industry standard for siphoning.
You’ll need heat-resistant silicone tubing to transport hot wort. The standard vinyl food-grade tubing cannot withstand high temperatures. If you plan to use it with a pump, make sure the tubing’s pounds per square inch (psi) rating will allow it to withstand the pressure the pump generates.
Vinyl beverage tubing should be used for beer lines and carbon dioxide (CO2) lines. The walls of the tubing, which are composed of vinyl, are extremely thick. Some beverage tubing is antimicrobial because beer lines will inevitably accumulate bacteria. Lines also come in different colors to help you tell what they are for.
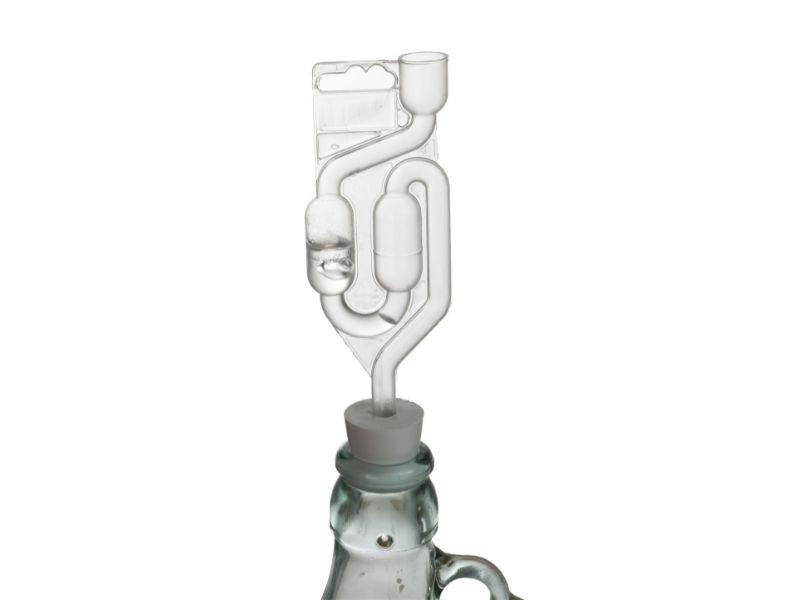
Airlocks for fermentation
With the aid of these innovative contraptions, CO2 can be released during fermentation without allowing air back in. The airlock will be filled with sanitizer water, which will act as an airlock. Excess CO2 will eventually push through the liquid and out the airlock once there is enough internal pressure. Any air inside is kept out by the liquid, preventing oxidation or contamination.
Stoppers
A stopper is a plug used to close containers such as flasks, bottles, carboys, and barrels. They are also frequently referred to as a bung or a cork. Stoppers are available in a wide range of sizes and forms to suit a variety of applications. Most stoppers have a conical form, which allows for some of the stoppers to rest within the container they are used to close. Some stoppers, however, are cylindrical in shape and are frequently used on flasks and tubes.
Even though the dimensions are generally consistent, there could be a few millimeters of variation across providers, so make sure to double-check their sizing before you buy. Choosing a bung with a pre-drilled hole can help you avoid headaches if you plan to use it with an airlock.
Auto-Siphons and Racking Canes
You’ll need something to help you get the beer flowing through your carefully selected tubing when you’re ready to transfer it. The standard auto-siphon is a plastic tube in the shape of an L. The short end will be connected to the tubing before the end of the racking came is inserted into the brew.
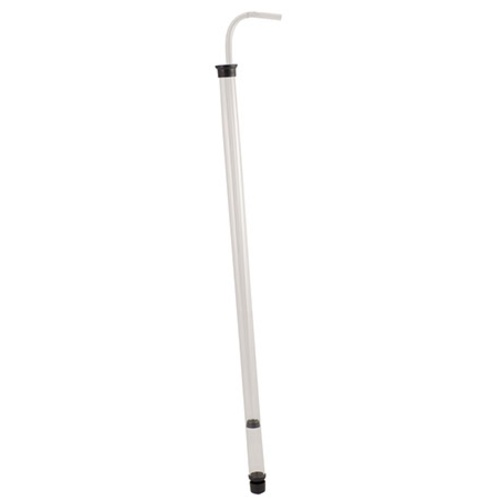
The use of an auto-siphon is the alternative method. This contraption is actually a tube that contains a racking cane. To initiate your transfer, you pump it like a plunger. A very simple but helpful piece of brewing equipment.
Brushes and Beer Funnels
The number of times that inexpensive yet useful funnels and brushes come in handy is too great to count. Funnels are available in a range of sizes, made of plastic or stainless steel, and with or without internal filters. If you like to avoid a big mess get some funnels.
The insides of bottles, carboys, tubing, kegs and even tiny faucet caps with built-in brushes can all be cleaned with a variety of brushes. There are different sizes and material brushes that are best for each cleaning job. A bottle brush can’t do the job of a larger fermenter brush.
Tools for Measuring and Testing
You’ll need to precisely measure ingredients, evaluate the quality of your water, and analyze your wort to produce the greatest brew you can and be able to repeat it consistently.
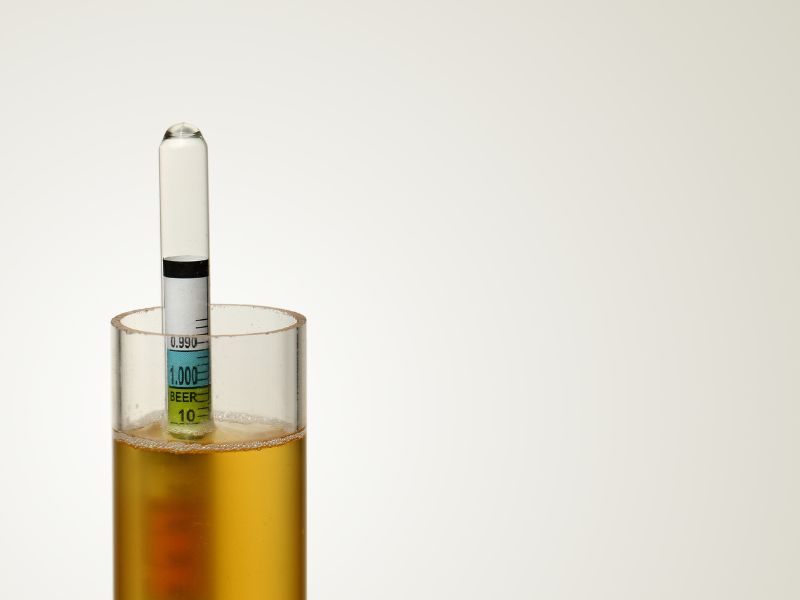
Test jars and hydrometers
Hydrometers and test jars are essential pieces of homebrewing gear used to measure the specific gravity of the wort. They are inexpensive and serve the crucial purpose of informing you of the status of fermentation. You will take your original gravity before fermentation begins and during fermentation to monitor the process of turning wort into beer. When you decide to bottle or keg you will then take a final gravity reading to use in your calculation for the beer’s ABV.
Additionally, they can make it simple and efficient for you to repeat the procedure with subsequent brews. Just don’t drop the hydrometer! They do break often but they are replaceable and affordable.
Electronic scales
You probably won’t need a scale when you first start homebrewing, especially if you’re using beer kits. However, as you continue, you’ll want to measure items, such as grains, before milling them, so that you can refine your recipes and use them repeatedly.
Make sure your scale can measure in grams if you plan to use it for sensitive ingredients like spices.
Misc. Testing Equipment
Serious homebrewers need testing equipment, which can include everything from pH and chlorine test strips to whole digital analysis kits. Digital analysis can aid in reproducing brews and ensuring consistency by providing data like alcohol percentage and fermentable sugars.
Testing the water you use for brewing will also help you prevent chlorine from imparting bad flavors to your beer. You can also buy testing kits where you put a sample of beer into a sterile bottle and mail it to a lab for analysis (similar to home water test kits).
Using clean water is important no matter your level of skill. However, you generally won’t need a lot of specialized water analysis for small-batch brewing. The bulk of tests and chemicals available for homebrewing will be utilized for duplicating recipes in larger volumes and ensuring quality.
Beer Bottling & Serving Equipment
There are many options available for storing your finished beer. Homebrewers normally start with a 5-gallon extract beer kit and then end up bottling their beer. We believe every homebrew should experience the process of bottling their homebrew. And we also think there is always a use for bottling no matter how advanced you get. We will now go over some of the options to store and serve your tasty homebrew.
Bottles
Beer bottles are often made of clear glass or amber glass and come in sizes of 12, 16, or 22 ounces, 750 milliliters, and liters.
Swing-top bottles come with caps attached to hinges resembling the Kolsch beer bottles, while some have simple crown tops or no caps at all.
Kegs
There are many benefits of kegging, but the following are the main ones to remember: Because you’ll be utilizing a CO2 tank to carbonate your beer, kegged beer will be ready to consume sooner than bottled beer! Additionally, you may carbonate to any desired degree, eliminating any uncertainty that may arise from spontaneous carbonation. There will also be no more filling, cleaning, and capping approximately 48 bottles of beer for a 5-gallon batch. Most people will never return to bottling once they find how much easier it is to keg their beer.
Growlers
Growlers are the best option if you enjoy sharing your beer with others. They are made of stoneware, ceramic, stainless steel, or glass. Gifting specialty growlers of your beer is a lovely idea.
Growlers come in a variety of sizes, ranging from 32 ounces to two liters. Growlers are the best option if you want to consume a serving of beer without exposing it to the air.
Just know that glass growlers are not meant for fermentation. They are not rated to handle the PSI that occurs when your wort ferments.
Caps
Your beer bottles can be closed with a conventional silver-crown top, something customized with a logo, or some fancy colors. Everything is up to your individual taste.
Even caps with oxygen-absorbing materials are available to keep your bottles from oxidizing.
Cappers
Choose a portable capper if you really appreciate the sensation of brewing beer with your own two hands. It’s just a simple metal press that firmly presses a crown top onto your bottles. Tabletop cappers, which are more expensive but more durable and practical, hold your bottle in place as you cap it and speed up the process. There are even electric cappers to boost speed and effectiveness if you have a big budget.
Fillers
A bottling wand or bottle filler is the simplest and least expensive technique to start and stop the flow of beer into your bottles. Its straightforward mechanics make it an easy, practical way to fill your bottles, whether it has a gravity-fed or spring-loaded valve.
Beer guns are the next level of filling your bottles and will cost you a little extra. A great benefit is less oxygen getting into your final product.
Brushes and Washers
Long brushes and hose attachments designed for cleaning carboys and bottles’ complex shapes are available. Although not absolutely necessary, these tools certainly make the task of cleaning difficult containers much simpler.
Storage and Drying Racks
When you bottle your beer, you don’t want any stray water from washing to weaken it. Before bottling your beer, the bottles must totally dry out.
You may dry your bottles by hanging them upside-down over a peg using these devices, which come in round, tree-style, or flat racks. For storage that takes up less room, certain racks can even be stacked with clean bottles inside.
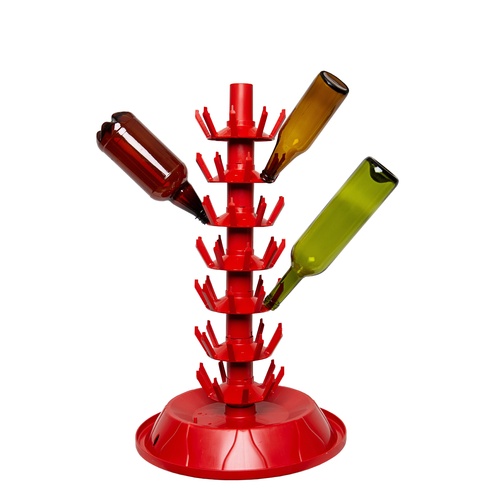
45 Seat Bottle Tree with Rotating Base
Labels
You can add your own label to your bottled beer whether you buy blank labels and print them at home or buy pre-made, personalized ones. Although they’re not a definite must, branding and labeling your homebrew can be a lot of fun.
Cleaning and Sanitizing supplies
Not only will clean beer taste better but keeping everything in your brewing and bottling process clean and hygienic will also help to reduce bacterial growth and potential sickness. Nobody wants to lose a batch of beer to an infection from bacteria. Brewers put in too much effort and money for a brew to be tossed because of dirty and or non-sanitized equipment. The mantra is clean and sanitize.
Cleaner
There are many cleaners available to clean your equipment. You can use any cleaner that does not leave a residue. You have to clean before you can sanitize.
We recommend PBW (Powder Brewery Wash). A safe alkaline cleaning for anything around your brewhouse is PBW.
Because it outperforms caustic chemicals without cleaning, many home brewers like it. Simply place your kettle, bottles, carboy, and other items in it for a thorough soak.
Sanitizer
You’ll normally need to dilute a tiny quantity of sanitizer in a bucket of several gallons of water. It comes in powder and liquid forms. Most brewing sanitizers don’t need to be rinsed after use if they are diluted properly before being flushed through your homebrewing equipment.
Sanitizer is unquestionably necessary for producing clean, uninfected beer. We recommend Starsan. It’s a popular non-rinse acid-based sanitizer, that is rinse-free.
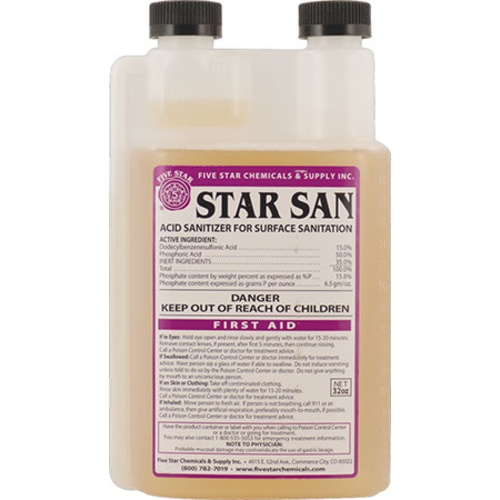
Our preferred acid-based NO-RINSE brewing sanitizer, with built-in measurement convenience. Additionally, the foaming action helps to sanitize every crevice and crevice.
Line Cleaner
You need line cleaner If you keg your beer. Line cleaner, which is available as powder, tablets, or liquid, differs from other cleansers in that it is designed to deal with the biofilm and bacteria that develop in beer lines. Before using the lines for beer, be aware that some solutions are caustic and need to be completely flushed.
But regardless of the cleaner you select, you must thoroughly rinse your lines.
To Sum it Up
There are a lot more types and variations of equipment not mentioned. This is meant to be a general guide for homebrewing equipment to get you started. We will follow up with more in-depth info for each item.
As you get more experience and your setup becomes inadequate, you can upgrade your homebrewing equipment. Remember that some tools, like a brew kettle, are important, but other equipment is either ineffective for non-commercial use or prioritizes aesthetics over functionality. Avoid being seduced by the shiny and likely pricey items you don’t actually require. Unless, of course, you simply desire a nice setup. Nothing incorrect about that either. If you have the extra money go for it.
A reliable homebrewing setup is a long-term commitment if you intend to homebrew for any length of time. You can never go wrong if you select your equipment with quality in mind.
© 2011-2023 by Brew.info. All rights reserved. No part of this document may be reproduced or transmitted in any form or by any means, electronic, mechanical, photocopying, recording, or otherwise, without prior written permission of Brew.info.
Author: Stu
Meet Brew.info's founder and head brewer, Stu. He began homebrewing as a hobby 13 years ago and has now made it a full-time career. He gives his advice, recipes, and reviews of equipment on Brew.info in an effort to encourage others to experience the satisfaction of homebrewing beer. You can find him trying out new breweries and beers, or unwinding at home with a pint of his most recent creation, when he isn't busy brewing or writing about beer. Cheers!


