The Homebrewing Starter Kit is your gateway to creating your very own craft beer at home. With the explosion of craft beer culture, more and more people are delving into the world of homebrewing. In this article, we will discuss everything you need to know to begin brewing, from the essential equipment to the brewing process itself.
The Basics of Homebrewing
Homebrewing is the process of making beer at home using basic ingredients such as malt, hops, yeast, and water. It allows you to experiment with different flavors and styles while enjoying the satisfaction of creating your very own brews. It’s a fun and rewarding hobby that can also save you money in the long run. So, let’s dive into the essential components of a Homebrewing Starter Kit.
Essential Equipment for Your Homebrewing Starter Kit
When starting your homebrewing journey, it’s crucial to have the right equipment on hand. The following are some essential items that should be included in any Homebrewing Starter Kit.
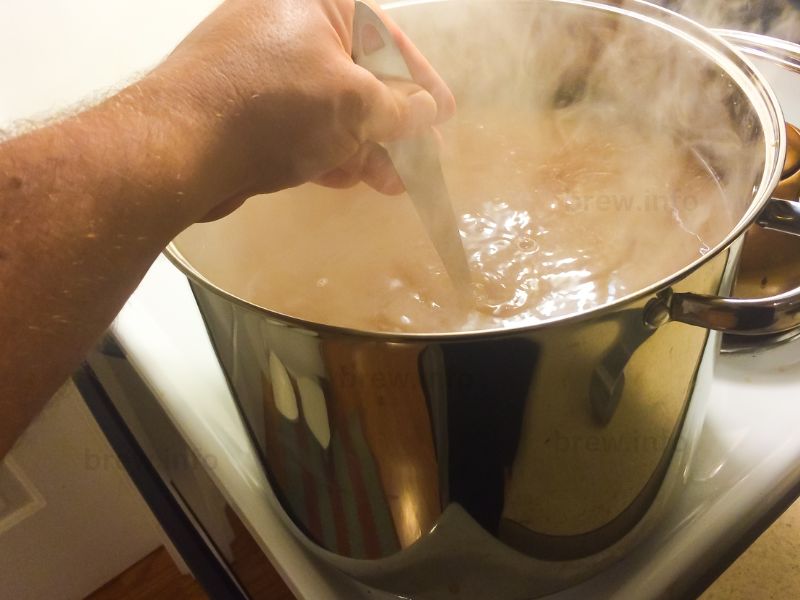
- Brew Kettle: This is where the magic happens. A large stainless steel or aluminum pot (minimum 5 gallons) will be your go-to for boiling your wort, the liquid extracted from the mashing process.
- Fermenter: A fermenter is a container in which your wort will transform into beer. A 6.5-gallon food-grade plastic bucket with a tight-fitting lid and airlock will suffice. Alternatively, you can use a glass or plastic carboy.
- Thermometer: A quality thermometer is vital for monitoring temperatures during the brewing process. Digital or dial thermometers are both acceptable options, but accuracy is key.
- Hydrometer: This essential tool measures the specific gravity of your wort, which helps you track fermentation progress and calculate the alcohol content.
- Stirring Spoon: A long-handled, heat-resistant spoon is necessary for stirring your wort during the brewing process. Stainless steel or plastic options are both suitable.
- Siphon and Tubing: A siphon, coupled with food-grade tubing, is necessary for transferring your wort from the brew kettle to the fermenter and later from the fermenter to the bottling bucket.
- Bottling Bucket: A food-grade plastic bucket, similar to the fermenter, but with a spigot for easy bottling.
- Bottle Filler: A small, spring-loaded device that attaches to your tubing and bottling bucket for a no-mess, easy bottling experience.
- Capper and Caps: A handheld capper is used to seal your beer bottles, and you’ll need some new, unused caps for this purpose.
- Cleaning and Sanitizing Supplies: Cleanliness is crucial in homebrewing, so make sure to have a no-rinse sanitizer and a good cleaner on hand.
Ingredients for Your First Brew
Now that we’ve covered the equipment, let’s talk about the essential ingredients you’ll need for your first brew.
- Malted Barley: This is the backbone of your beer, providing fermentable sugars and flavor. You can buy malted barley in various forms, such as whole grains or pre-crushed, and even malt extract.
- Hops: Hops are the flowers of the hop plant, adding bitterness, flavor, and aroma to your beer. There are many varieties to choose from, so you can experiment with different hops to achieve the desired taste.
- Yeast: Yeast is a living organism that ferments the sugars in your wort, creating alcohol and carbon dioxide. There are two main types of yeast used in brewing: ale yeast and lager yeast.
- Water: Quality water is essential, as it makes up the majority of your beer. Tap water is generally acceptable for homebrewing, but you may want to consider using filtered or spring water for better results.
The Brewing Process: From Grain to Glass
With your Homebrewing Starter Kit and ingredients in hand, you’re now ready to embark on the brewing journey. The following is an overview of the brewing process.
- Mashing: This is the first step, where malted barley is soaked in hot water to extract fermentable sugars. The resulting sweet liquid is called wort. If you’re using malt extract, this step is simplified as the sugars are already extracted and concentrated.
- Boiling: Next, the wort is boiled in your brew kettle for about an hour. During this time, hops are added at various intervals to provide bitterness, flavor, and aroma. The boil also sterilizes the wort, ensuring a clean fermentation.
- Cooling: Once the boil is complete, the wort must be cooled quickly to a temperature suitable for pitching yeast, usually around 65-75°F (18-24°C). This can be done using an immersion chiller or an ice bath.
- Fermentation: With the wort cooled, it’s time to transfer it to your fermenter and add the yeast. The yeast will consume the sugars in the wort, producing alcohol and carbon dioxide. This process usually takes 1-2 weeks, depending on the yeast strain and temperature. It’s best to not rush the process and have some patience.
- Bottling: After fermentation, it’s time to transfer your beer to the bottling bucket, leaving behind the yeast sediment. A small amount of priming sugar is added to encourage carbonation. Then, using your bottle filler, fill your sanitized bottles, cap them, and let them condition at room temperature for 1-3 weeks.
- Enjoying: With your bottles conditioned, it’s time to chill them in the fridge and enjoy the fruits of your labor! Share your creations with friends and family, and bask in the satisfaction of having brewed your very own beer.

Expanding Your Homebrewing Horizons
As you become more comfortable with the brewing process, you may want to explore different styles of beer, experiment with new ingredients, or refine your techniques. Some possibilities to consider include:
- All-Grain Brewing: This advanced method involves mashing your own grains, allowing for greater control over the flavor profile and ingredients.
- Kegging: Rather than bottling, consider investing in a kegging system. This can save time and provide a more consistent carbonation level.
- Temperature Control: Controlling fermentation temperature can have a significant impact on your beer’s flavor profile. A fermentation chamber or temperature controller can help you maintain a consistent temperature.
- Joining a Homebrewing Club: Connecting with other homebrewers can provide invaluable knowledge, support, and camaraderie. Share recipes, techniques, and feedback with fellow enthusiasts.
- LHBS: Find a good local homebrew shop. There you can find equipment and the ingredients needed to brew. You will also be able to tap into a wealth of brewing knowledge provided by the staff. Some homebrew shops even have bottle shares and other get togethers.
- Creativity: The best part of homebrewing is creativity. You can experiment and use unusual ingredients if you want. And there are thousands of homebrewing recipes created by others. You can use those recipes as a starting point or modify them. Once you gain some confidence you can start creating your own recipes.
The world of homebrewing is vast, and the possibilities are endless. With a solid Homebrewing Starter Kit and a passion for crafting unique brews, you’ll be well on your way to enjoying the rewards of this satisfying hobby.
The Homebrewing Starter Kit is your ticket to exploring the exciting world of brewing your own beer at home. Equipped with essential tools and ingredients, you’ll be able to craft unique brews that cater to your personal taste. As you gain experience and confidence, you can expand your horizons by trying new techniques and styles, joining homebrewing clubs, and sharing your creations with friends and family. There’s nothing quite like the sense of accomplishment that comes from enjoying a glass of your very own homebrewed beer. So, gather your equipment, gather your ingredients, and embark on a rewarding journey filled with creativity, learning, and delicious brews.
© 2011-2023 by Brew.info. All rights reserved. No part of this document may be reproduced or transmitted in any form or by any means, electronic, mechanical, photocopying, recording, or otherwise, without prior written permission of Brew.info.
Author: Stu
Meet Brew.info's founder and head brewer, Stu. He began homebrewing as a hobby 13 years ago and has now made it a full-time career. He gives his advice, recipes, and reviews of equipment on Brew.info in an effort to encourage others to experience the satisfaction of homebrewing beer. You can find him trying out new breweries and beers, or unwinding at home with a pint of his most recent creation, when he isn't busy brewing or writing about beer. Cheers!


